Polkadot-JS Guides about Proxy Accounts
Proxies allow users to use an account (it can be in cold storage or a hot wallet) less frequently but actively participate in the network with the weight of the tokens in that account. Proxies are allowed to perform a limited amount of actions related to specific substrate pallets on behalf of another account. The videos below contain more information about using proxies.


For the latest information on the calls and pallets that can be fully accessed by proxies, check the source code in the runtime folder on the Polkadot repository
Creating Proxy with Polkadot-JS
To create a proxy account with Polkadot-JS read this support article.
Removing Proxy with Polkadot-JS
Read the section "Removing Proxies" on this support page to learn how to remove proxies.
View your Proxy on Polkadot-JS
To view your proxy, just go on the Accounts menu in the Polkadot-JS UI, next to the proxied account you will notice a blue icon. Hover on it, and you will see Proxy overview. Click on it and you will be presented with a list of all proxies for that account.

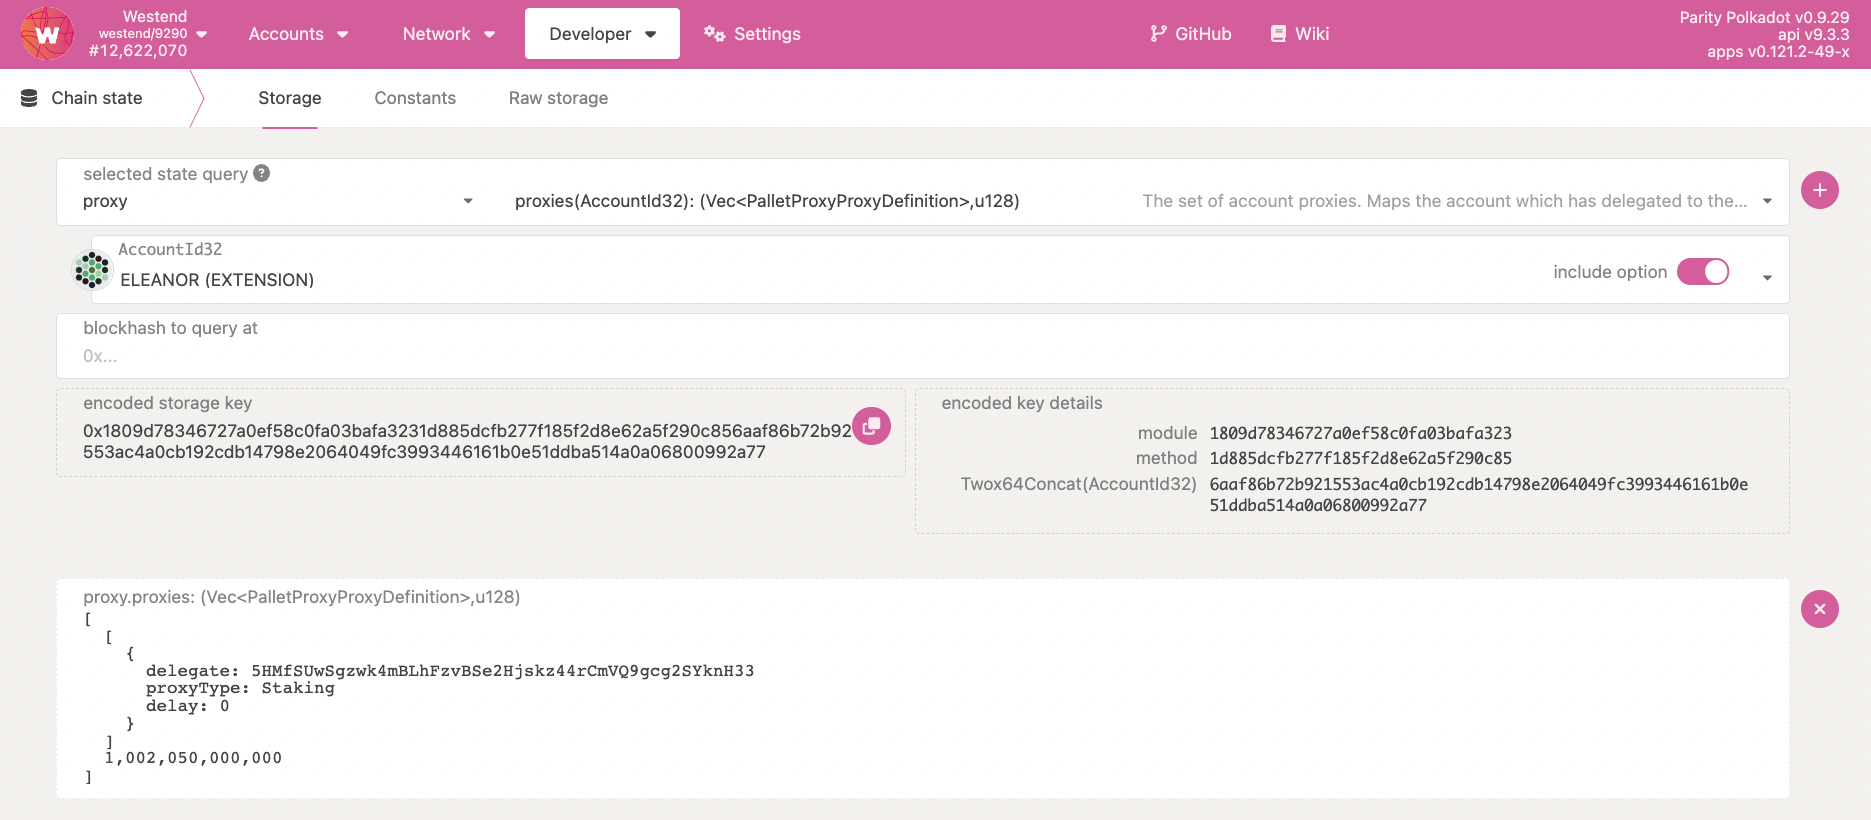
Additionally, you can head over to the Chain State tab (underneath the Developer menu) on Polkadot-JS Apps. If you've created your proxy on a Polkadot account, it is required to change your network accordingly using the top left navigation button. On this page, the proxy pallet should be selected, returning the announcements and proxies functions. The proxies function will allow you to see your created proxies for either one account or for all accounts (using the toggle will enable this). Proxy announcements are what time lock proxies do to announce they are going to conduct an action.
Set-up and Use of Time-delayed Proxies with Polkadot-JS
See this video tutorial to learn how you can setup and use time-delayed proxies. The video goes through the example below.
Initially the time time-delayed proxy announces its intended action using the proxy.announce
extrinsic and will wait for the number of blocks defined in the delay time before executing it. The
proxy will include the hash of the intended function call in the announcement. Within this time
window, the intended action may be canceled by accounts that control the proxy. This can be done by
the proxy itself using the proxy.removeAnnouncement extrinsic or by the proxied account using the
the proxy.rejectAnnouncement extrinsic. Now we can use proxies knowing that any malicious actions
can be noticed and reverted within a delay period. After the time-delay, the proxy can use the
proxy.proxyAnnounced extrinsic to execute the announced call.
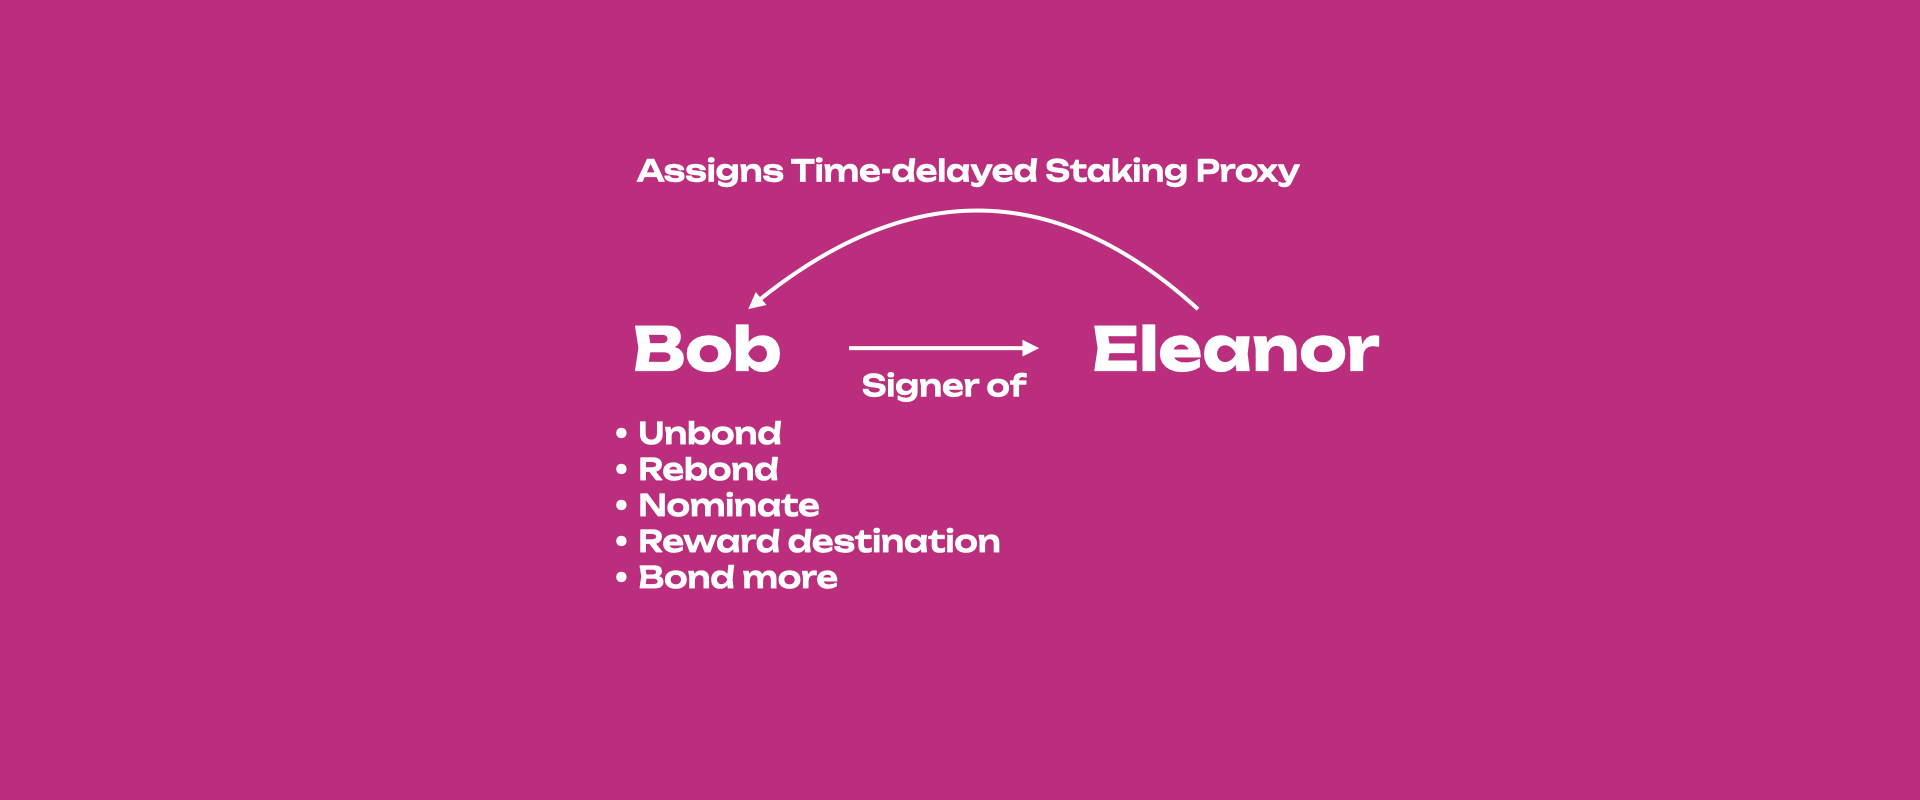
Let's take for example the stash account Eleanor setting Bob as a time-delayed staking proxy. In this way, if Bob submits an extrinsic to change the reward destination, such extrinsic can be rejected by Eleanor. This implies that Eleanor monitors Bob, and that within the time-delay she can spot the announced extrinsic. Eleanor can check all the proxy call announcements made by her account's proxies on-chain. On Polkadot-JS UI, go to Developer > Storage > Proxy > Announcements to check the hashes for the calls made by the proxy accounts and the block height at which they are enabled for execution.
If you try to use proxy.proxyAnnounced to execute the call within the time-delay window you will
get an error "Proxy unannounced" since the announcement will be done after the time delay. Also note
that regular proxy.proxy calls do not work with time-delayed proxies, you need to announce the
call first and then execute the announced call on a separate transaction.
Proxy calls
Proxy calls are used by proxies to call proxied accounts. These calls are important for example in the case of pure proxies, as any attempt to sign transactions with a pure proxy will fail. For more details see the dedicated section about pure proxies.
Nested Proxy Calls
As the term suggests, nested proxy calls are proxy calls within proxy calls. Such calls are needed if there are proxied accounts that are proxies themselves. In the example diagram below, Alice has a stash account that has a staking proxy account, P-C. P-C is a pure proxy, a proxied account originally spawned by Charly that is now an any proxy of P-C and signs everything on its behalf.
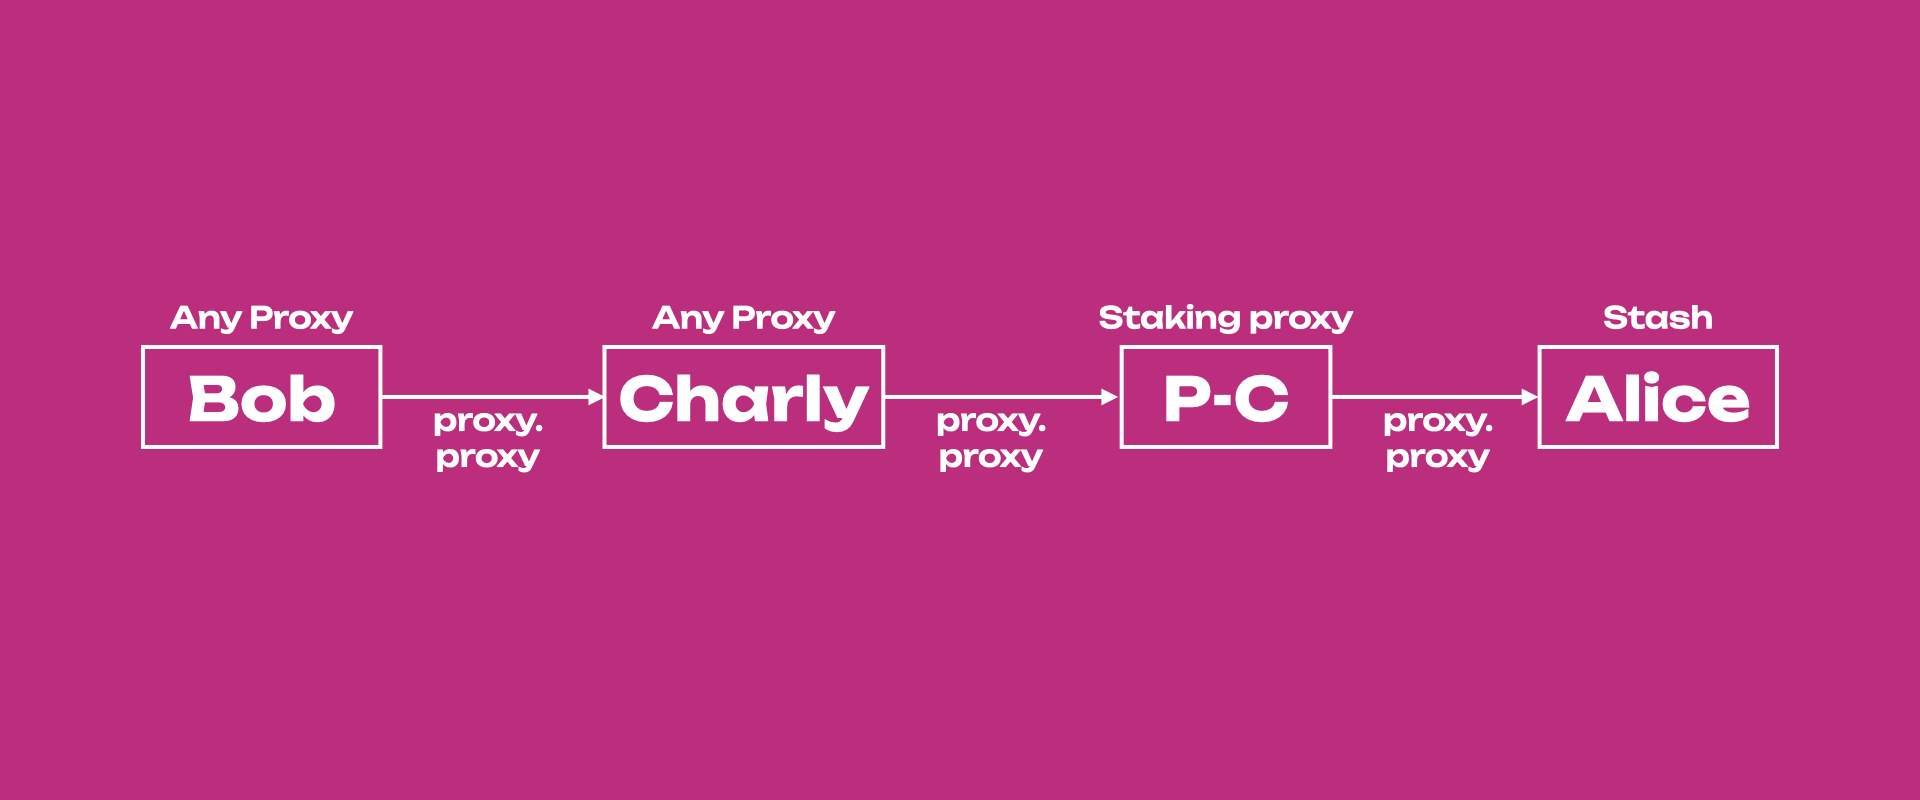
For example, to bond more funds, Charly needs to submit a prox.proxy extrinsic to P-C, which in
turn submits a proxy.proxy extrinsic to Alice including for example a staking.bondExtra
extrinsic, specifying the number of extra tokens that need to be bounded. If Charly wants to leave,
a new account can take his place as any proxy (before Charly leaves!). There is no need to change
the staking proxy account. Also, Alice is the only one who can remove P-C as a staking proxy, and
P-C can only perform staking-related tasks. For example, P-C cannot send funds out from Alice's
account.
Proxy calls can be done using the Extrinsic Tab in the Polkadot-JS UI. Nested proxy calls can be
done by calling each proxy.proxy extrinsic separately, or in some cases by just calling the last
proxy.proxy extrinsic. In the diagram above, submitting the proxy call from P-C to Alice will
automatically ask for Charly's signature. Thus one proxy call will trigger the second one because
Charly's is the only any proxy of P-C, and P-C cannot sign anything. While if we want to use Bob's
account we will need to submit all three proxy calls.